Welcome!

Happy Friday!!

Are you ready for the weekend?  Need some inspiration to go in your sewing room?

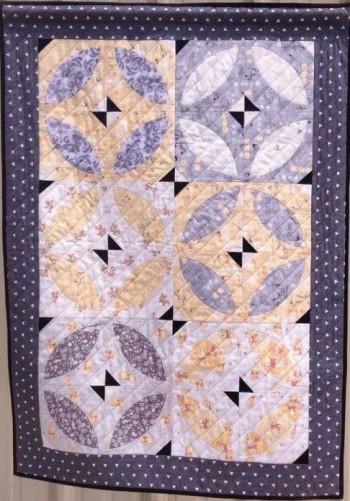
Here is a quilt that will surely get you going!  This quilt was made using our Disney Winnie the Pooh fabric collection.
IMG_2680_WEB

This quilt uses lights and darks to feature the Orange Blossom block design, using fabric with soft yellows, whites and grays. There is a little black and white to offset the middle of each circle block and catch the eye. Winnie the Pooh has never been sweeter than in this new pattern, with his friends Tigger and Piglet. The gray borders give this a modern touch and black binding helps tie the contrast together.

Thank you so much for sharing with us Bethany! The quilt is just stunning!

Bethany is the pattern designer of Orange Blossom.

You can find the pattern on PlumEasy Patterns website.


Have a lovely weekend!

more.
27 May

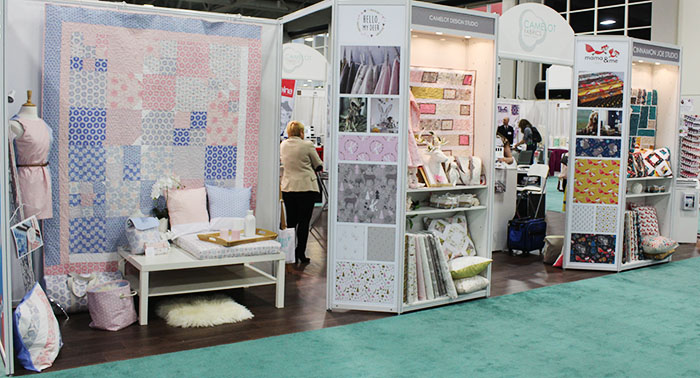
Spring Quilt Market took place last weekend and I thought I should take our Thankful Thursday blog to thank all the Quilt Shop owners that stopped by our booth during the show to see our new lines.  As you may have read in last week’s post, we were more than ready to present our new lines and the feedback was great!

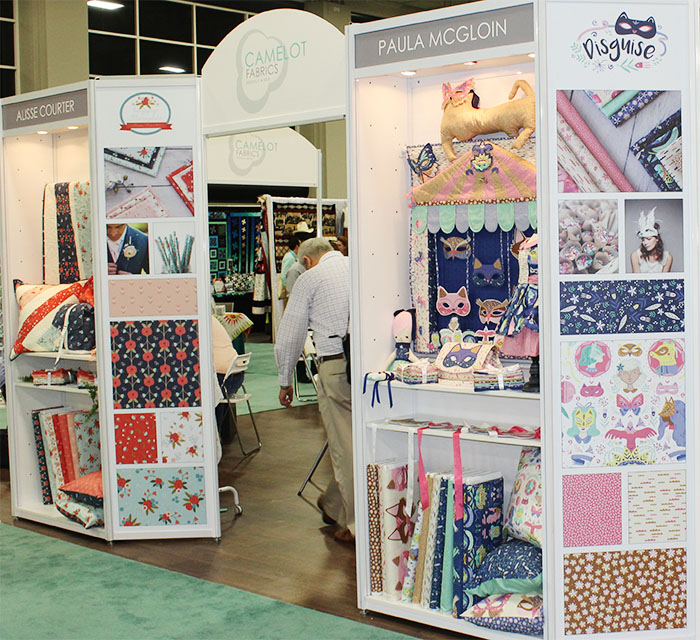
Everyone loved our booth and we have Shannen to thank for such a wonderful set up!

WEB_IMG_6240

I just loved the section featuring our Rose Quartz & Serenity collection by Jackie Savage McFee .  Everyone took notice of the Pantone colors of the year with so many projects to inspire. Hello my Deer collection was also a huge success as well as our Mama & Me Collection.


WEB_IMG_6260

Our Disguise collection  by Paula McGloin was also a huge hit! Everyone loved the idea of making masks with our fabrics.  And we can’t forget the lovely Happy Thoughts collection by Alisse Courter that captured the hearts of so many during the show.


WEB_IMG_6256

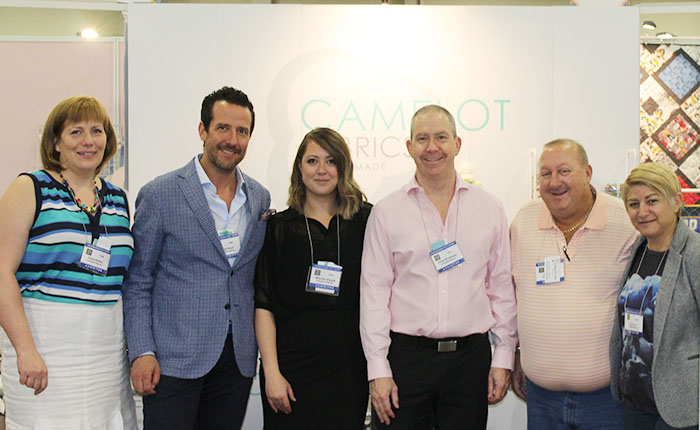
The team was really happy to be there and we thank you again for dropping by our booth.

Now in the weeks to come I plan to thank the fabulous designers behind all our great projects featured at Quilt Market.  They helped us make our booth a great success !

Have an amazing day, everyone :)

more.
26 May

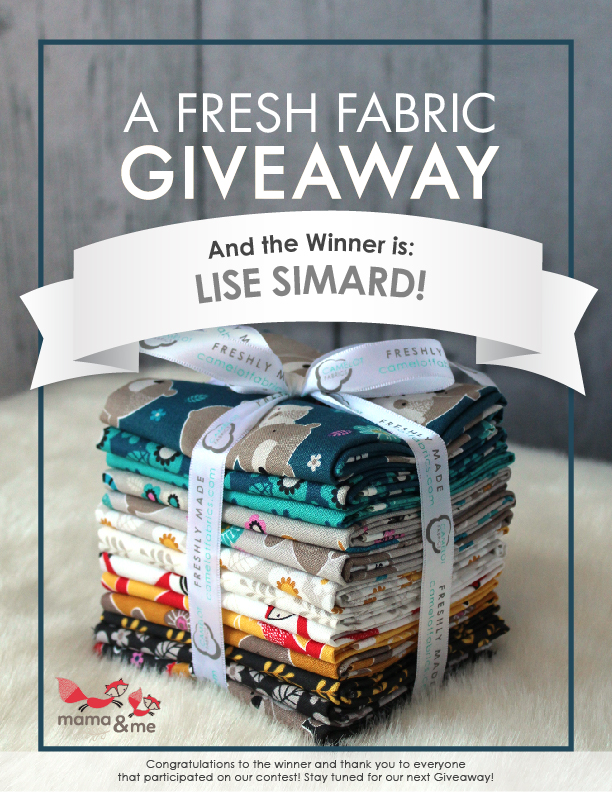
Congratulations to our Winsday winner: Lise Simard

BN_Giveaway

This week we hosted a 13 Fat Quarters GIVEAWAY of the Mama & Me collection on our Facebook Page. We wanted to know:

Which Quilt Festival would you love to attend?

We love doing these mini surveys although  I was surprised by how many could not answer the question.  This should be on your bucket list! You have to find one quilt show that is a must for you to see and you don’t have to spend a fortune either!

Start by contacting your local guilds to see when they have their shows.  Some guilds run an annual show while others run them every two years!  Keep in mind that the members do need to produce quilts in order to have a show so it all depends on them, and they are motivated if they have lots of people attending.  If you enjoy seeing these shows then start searching on the internet for quilt festivals close to you.

I started with local guilds and then I heard about the Vermont Quilt Festival which is only a few hours away from my home so I can make it a day trip.  The Festival contest exhibits entries from the United States, Canada and abroad. Four internationally known judges evaluate the entries and provide a brief written critique. The final score for each entry is the average of three judges’ scores. Score sheets and critiques are returned to contestants with their quilts.  So when you attend the Festival, you will see lots of ribbons ranging from 3rd to 1st place, Exceptional Merit and Best of ribbons.  I started attending these shows to see what made a quilt win an award and a few years later I actually started entering my quilts and receiving ribbons!

Ten years ago I began looking for Quilt Festivals abroad and arranged some of my holidays just to go and see them.  I was able to attend the International Quilt Festival of Ireland in 2012 as well as Salon Expo Magic Quilt in Lyon, France in 2009.  Both of these shows are no longer operating but it was great to be part of them.  I have also been to the Houston Quilt Festival which is such a dream come true. I am now planning to go and visit the Carrefour Européen du Patchwork  and I have just heard about the Textile Festival in The Netherlands!   But I would also love to attend Sister’s Outdoor, QuiltCon and all the AQS quilt shows!

So please do check your local area for quilt shows!  It is the season!  Start your bucket list and tell me all about it!


Lise Simard, I hope you will enjoy your local quilt show that is taking place this week end!  Tell us all about it! And if you can please email us your mailing address to  designstudio@camelotfabrics.com  by June 8th, 2016.  We cannot wait to see what you create with these fat quarters.  Please send us a picture for our Fan Friday blog!

And a huge thank you to everyone who entered!!

Stay tuned for next week’s Winsday…


Happy Sewing!

more.
25 May

Hi everyone,

Happy Tuesday! I hope you all are having an amazing one.

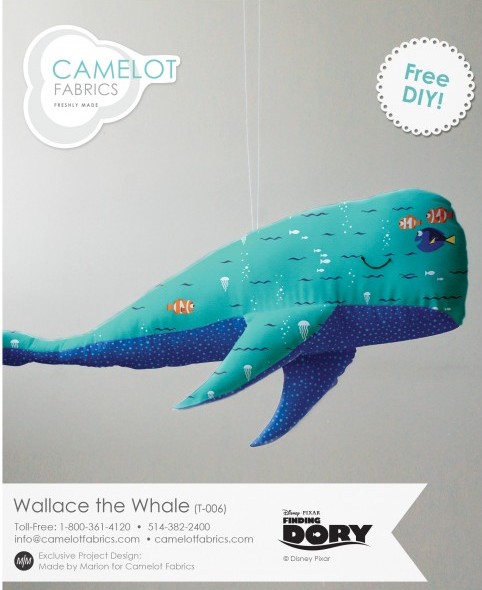
I am sure you will all agree that this is probably the cutest project we can make with our Finding Dory collection!

Wallace the Whale
T-006_DORY_page1

Our adorable and friendly whale combined with this fabulous collection just makes our hearts swoon. Wallace is a larger sized plush animal, so he is perfect as a cuddly pillow and toy for your loved ones.


The pattern is from our very talented Marion!  You can check out the free printable PDF of this pattern on our website. We hope you enjoy!

 SUPPLIES:
– 2/3 yard of The Design Studio quilting cotton (44” wide) from Camelot Fabrics in 2140504 #1 for Wallace’s Back
– 1/2 yard of The Design Studio quilting cotton (44” wide) from Camelot Fabrics in 2140507 #2 for Wallace’s Belly
– Fiber stuffing or fabric scraps
– Paper printer
– Contrasting embroidery floss & an embroidery hoop, for eyes
– 2 yds of ribbon, for hanging (optional)
– Basic sewing supplies: sewing machine, needle & coordinating thread, iron & pressing surface, scissors & fabric shears, straight pins  and a fabric marker


NOTES:
1. Please wash, dry & iron your fabric before beginning.

2. Use a 1/4” seam allowance throughout.

3. All seams are sewn Right Sides together.


CUTTING:
1. Print the Wallace the Whale template PDF at 100% scale and cut out the pages at their marked borders. Join the pages according to their numbered triangles and cut out the templates pieces.
2. Trace or pin the template to your fabric as indicated on the pattern pieces, and cut out the pieces in fabric. Take care to include the notches!
You will have:
– (2) Back pieces, mirror images of each other
– (2) Back fins, mirror images of each other

– (1) Belly, cut on the fold line
– (2) Belly fins, mirror images of each other

Note: For a directional print, trace the Back piece (2x) onto a single layer of fabric as shown, so that in both pieces the fabric’s pattern runs from the top of Wallace’s back toward his belly.
For non-directional cottons, cut your pieces from folded double layers of fabric.

1

EYES:
1. Transfer the Eye marks from the Back template to the Back fabric pieces. If you’re having trouble seeing the Eye through your fabric, use straight pins to mark either end and the center of the Eye curve, then trace between the pin points.
2. Embroider a sleepy Eye on each Back piece.

ASSEMBLY:
1. Sew the Fins to their matching body pieces as shown, with the notches aligned (the fins should point toward the tail ends of the body pieces). Press these seams toward the fins.

2

  1. Baste the ends of your ribbon to the Wrong Side of one Back piece as shown, at the notch in its top edge. The raw ends of the ribbon should point toward the fabric’s edge, and the long loop should point away from the edge.3
  2. Sew the Back pieces together as shown, from the center of the tail to the tip of the nose. Clip into your curves & press the seam open. Turn Wallace Right Side out, press the seam again and turn him Wrong Side out once more.4
  3. Pin & sew the Belly & its Fins to the Back & its Fins. Begin by pinning the tails together, then the Fins where they join the bodies, then around the remaining body, fin & nose edges. Leave a 4” gap behind one Fin, for turning. Backstitch at the beginning & end of this seam.
    Note: When sewing around the nose, have the Back pieces facing upward and be sure to keep them smooth as you go, to prevent any bunching or puckering.5
  4. Clip into the corners where the Fins join the body, and around your curves. Press the seam open & turn the whale Right Side out through the gap behind his Fin. A knitting needle or length of dowel makes it easier to invert the tips of his Fins & tail.
    6. Stuff Wallace firmly, making sure to stuff all the way into his tail & Fins, and whipstitch the gap closed.
    7. To eliminate any bulging between the Fins, stitch in the ditch (by hand) between the top & bottom seams of each Fin, closing the gap between them. You’ll want to use a doubled-up thread for this part.


We hope you have enjoyed our super sweet Wallace the Wallace tutorial this week! We would love to know what you think. If you decide to give this tutorial a try, or any of our DIYs, we’d love to see! You can send all your pictures to info@camelotfabrics.com or tag us on Instagram (#camelotfabrics). Have a whale of time (haha)! :)

Happy Sewing!


more.
24 May

Happy Monday!

I hope you had a fantastic weekend and that you were able to get some time to craft or sew.  We would love to see what you have made so send us a picture for our Fan Friday blog!

On to our Moody Monday!

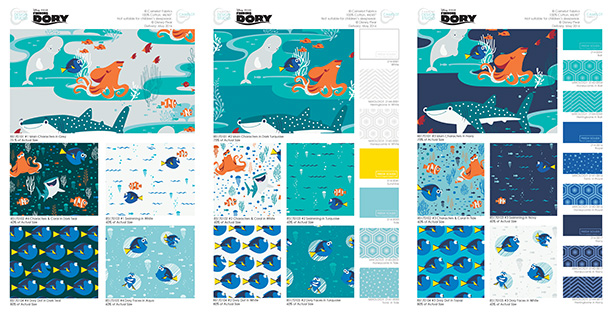
This week we are featuring our Finding Dory Collection by the Camelot Design Studio for Disney.  This fabric collection is simply adorable and I must admit that I have been having fun sewing projects with this line for a while.

Finding-Dory_inside_3fold_web

My kids are too young to have seen the Disney•Pixar Finding Nemo movie on the big screen but it doesn’t stop them from knowing all the fun characters and they are just ecstatic as I promised to bring them to see the movie on the big screen when released on June 17.  And you will all be happy to know that you can also get the beautiful collection in your local quilt shop now!


Click here to find the one nearest your home.


Happy Sewing!

more.
23 May