How To’s Day: Tabbed & Lined Curtains
November 26th, 2013 by admin
Hi everyone!
Happy Tuesday! We hope everyone is having a wonderful day. We don’t want to stress you…but there are four more weeks until Christmas, four more weekends for Christmas shopping. Now, you’re probably going through the list in your head of all the people you need to get gifts for…but don’t worry, don’t panic! We’ve got you covered with our creative and amazing DIY projects. And today, we’ve got another…the perfect home decor project for you or for an interior design-enthusiastic friend!
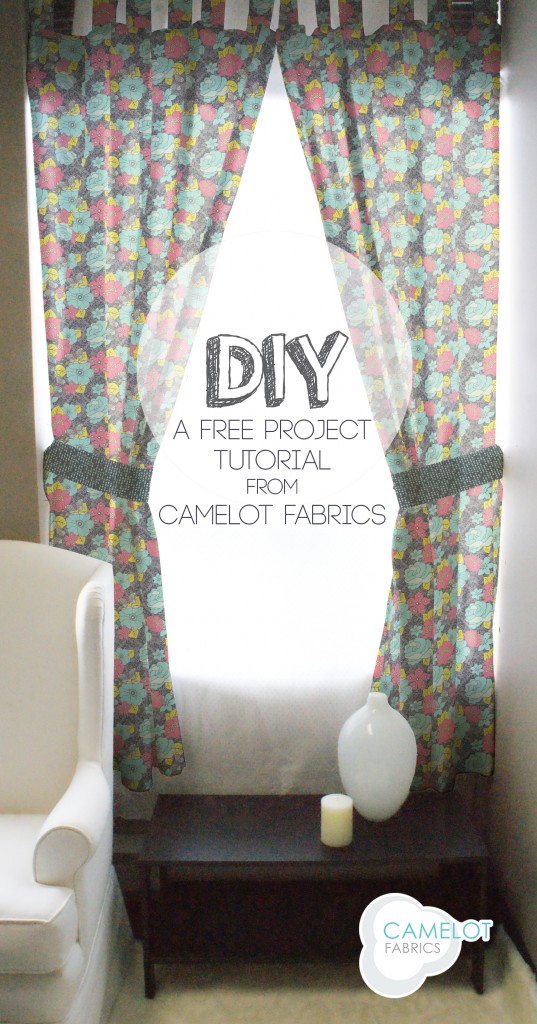
Today we are sharing with you our DIY Tabbed & Lined Curtains. Curtains may not seem like the easiest things to make, but trust us, our tutorial is super easy to follow…your windows will be looking fab in no time! Let’s get sewing!!
Click more for the full tutorial!
Tabbed & Lined Curtains Tutorial:
Supplies:
– 5 yards of Penelope, 44” wide quilting cotton in Main color. We used 2140701, Aphrodite’s Garden.
– 1/2 yard of Penelope, 44” wide quilting cotton in Sash color. We used 2140708 #1, Aqua Baubles.
– 4 yards of Enchanted 44” wide quilting cotton in Lining color. We used 001, White.
– Basic sewing supplies
– Sewing machine
– Needle & coordinating thread
– Iron & pressing surface
– Fabric shears
– Straight pins
– Measuring tape
Notes on Fabric:
Please wash, dry & iron your fabric before beginning. For this project, you’ll also want to trim your selvages. Unless otherwise noted, all seams are sewn with a 1/2” allowance.
Finished Dimension (excluding Tabs): 40” Wide x 6’ Tall
Fits windows 3’ – 5’6” Tall & 4’ – 6’ Wide
Curtain Panels
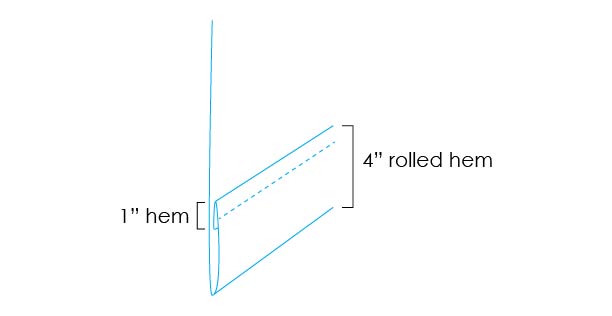
1. Cut 2 rectangular Panels from your Main fabric, 6’3” long by the full width of the fabric. Hem the Panels’ bottom edges, Wrong Sides together, at 1”. Turn these hemmed edges once more, Wrong Sides together, to create 4” deep rolled hems.
2. Cut 2 rectangular Panels from your Lining fabric 6” long by the full width of the fabric. Hem as for the Main fabric.
Tabs
1. Cut 2 strips from your Main fabric, 12” tall by the full width of the fabric. Cut these strips in half widthwise, then cut each of the resulting rectangles in half, and repeat once again so that each of the original strips has been cut into eighths as shown. You will have 16 rectangles, each one 12” tall and 1/8th the width of the fabric.
2. Fold these small rectangles in half lengthwise, Right Sides together, and sew the long edges closed to create open-ended tubes. Press your seams open and invert these tubes, then press each one flat with its seam running down the center of one side.
Assembly
1. Fold the Tabs in half, seam sides together and pin as shown along the top edges of your Main Panel pieces, against each Panel’s Right Side. The outer Tabs should be about 1” away from the Panels’ outer corners; distribute the remaining Tabs evenly along the Panels‘ top edges. You may use eight Tabs on each Panel, or fewer if you’d like the Curtains to drape more between Tabs. In our example, we used six Tabs per Panel.
2. Baste the Tabs in place with a single line of stitches 1/4” from each Panel’s edge.
3. Place a Lining Panel on top of each Main Panel, Right Sides together, with the Tabs sandwiched between them. Sew each Lining Panel to its Main Panel along the top edge and press the seams open.
4. Lay your Panels out once more, Right Sides together, and smooth out any wrinkles so that the Lining & Main Panels line up evenly all the way to their edges. Pin & sew each Lining Panel to its corresponding Main Panel along the two long sides, but do not sew the hemmed bottom edges together.
5. Stitch the raw edges at the bottom corner of each Main Panel with an Invisible Hem.
Sashes
1. Cut two rectangles from your Sash fabric, 9” tall by the full width of the fabric. Fold these rectangles in half lengthwise, Right Sides together, and sew the long edges closed to create two long open-ended tubes. Press the seams open.
2. Invert these tubes and press them flat as you did the Tabs, with the seams at the center of one side. Whipstitch the short ends closed by hand.
3. Feed a curtain rod through your Tabs to hang your new Curtains, and tie them open with their Sashes to let in the light!
We hope you enjoyed this tutorial! Now that you know how to make your very own curtains, you can easily change up the decor of your home for the holidays, or any time you need a change. It’s the perfect way to change up a home look in a cost-efficient way. If you decide to give this tutorial a try, or any of our DIY tutorials, please send us a picture to info@camelotfabrics.com or tweet it to us! We LOVE seeing all of your projects using our fabric.
Happy Sewing!
Comments are closed.


