How To’s Day: Allison Cole Coin Purse / Card Wallet
November 12th, 2013 by admin
Hello everyone!!
Happy Tuesday! We’ve officially been getting a trinkle of snow here, which only means one thing. The holiday season is officially here! Well, Christmas is 42 days away (but who’s counting, right? ;)) but there is still lots to do and prepare for before the big day. But likewise, it’s those days leading up that makes the holiday magical and special. Putting up the glistening decorations, singing carols with your friends and family, building snowmen and drinking hot cocoa, baking lots of scrumptious holiday treats, reading Christmas stories by the fire, and of course going out in the hustle & bustle to shop for all your loved ones. Seeing a person’s face light up when they open up their present from you, there truly is no better feeling.
And speaking of gifts to give, we’ve got some fantastic DIY projects you can use for this upcoming holiday season that are beautiful and thoughtful. There truly is something very special about receiving something that someone took the time to make especially for you. Today we share with you another great DIY project that would make the perfect gift or stocking stuffer: our Coin Purse/Card Wallet, using our Allison Cole What A Gem and Portland collections.
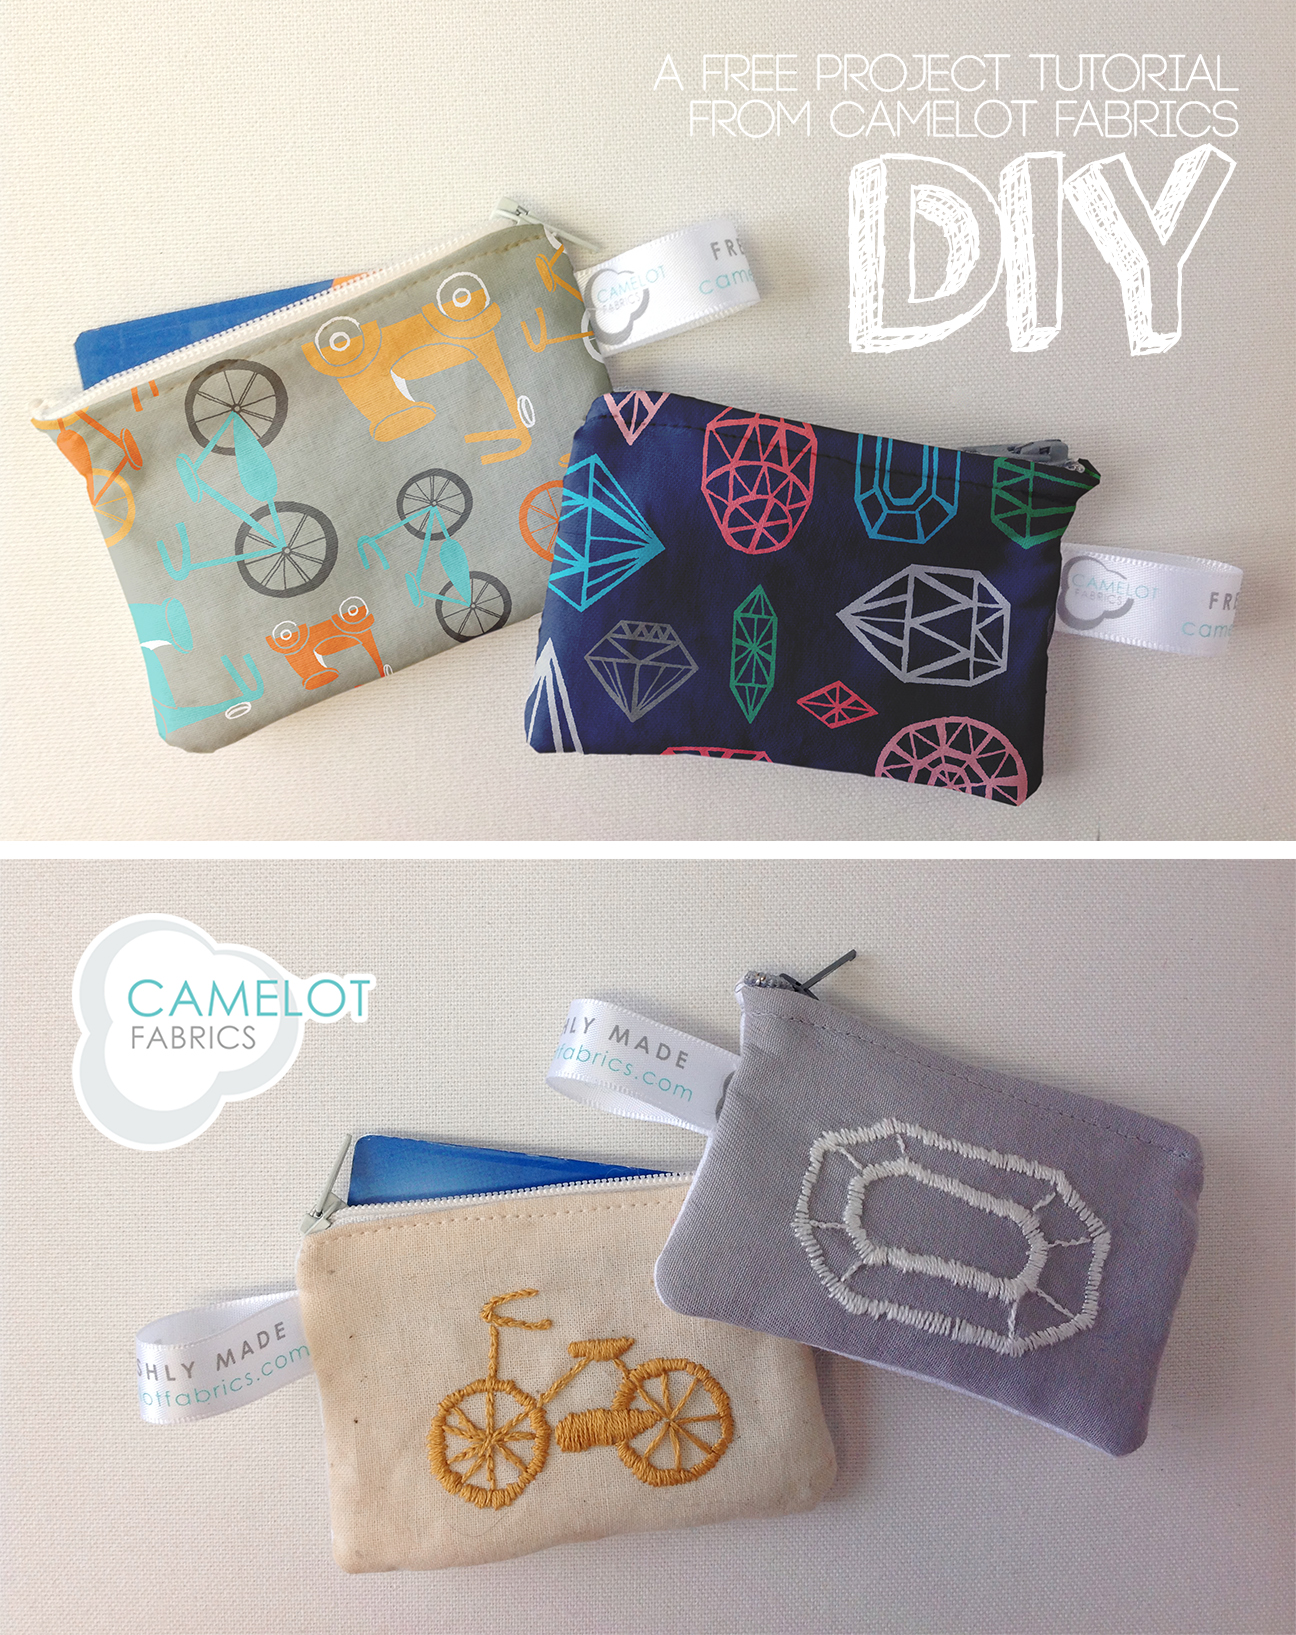
In this week’s tutorial we featured a couple of patterns by our licensed designer, Allison Cole. For our Portland card wallet we used 8140504 #1, Bikes & Vespas in Grey. For the What a Gem coin purse we used 8140603 #1, Navy Gems.
Click to see the full tutorial after the jump!
Allison Cole Coin Purse / Card Wallet Tutorial:
Supplies for the What a Gem Coin Purse:
– 4” x 3” piece of quilting cotton
– Fat eighth of coordinating solid in a light color, or enough to mount on an embroidery hoop
– 4”x 6” piece of white iron-on fusing
– 4 1/2” zipper*
– Small embroidery hoop
– Coordinating embroidery floss
– Needle with a large eye
– Pencil
– Paper printer
– Basic sewing supplies:
– Sewing machine
– Iron & pressing surface
– Needle & coorinating thread
– Straight pins
– Fabric shears
– Straight-edged ruler
* You can cut a longer zipper down to size; simply sew several stitches on the spot with your widest zig-zag stitch, the length set to 0, 4 1/2” from the top of the zipper’s teeth. Then trim off the excess length of the zip’s tape a little way beyond these stitches.
Notes on Materials:
Please wash, dry & iron your quilting cotton and solid fabric before beginning.
The fusing will not only give structure to your coin purse or card wallet, but will also protect the inside of your embroidery and serve as a smooth surface for the inside of the project.
Most embroidery floss is 6-ply, meaning it is composed of 6 distinct strands twisted together. For this and other embroidery projects, you’ll want to gently separate the floss into two 3-ply threads, which are more manageable than the original floss but still thick enough to require the extra-large eye in your embroidery needle.
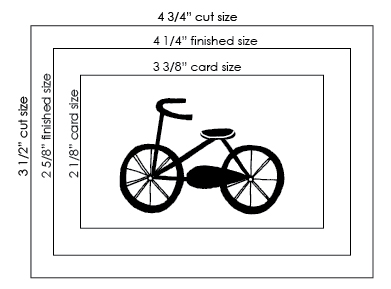
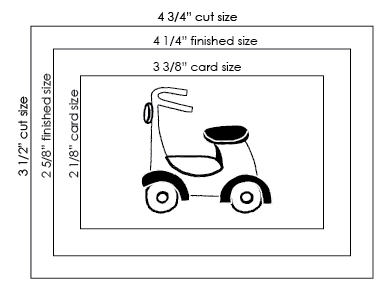
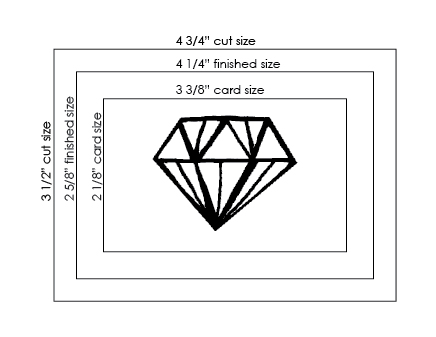
Templates:
PORTLAND
WHAT A GEM

Embroidered Panels
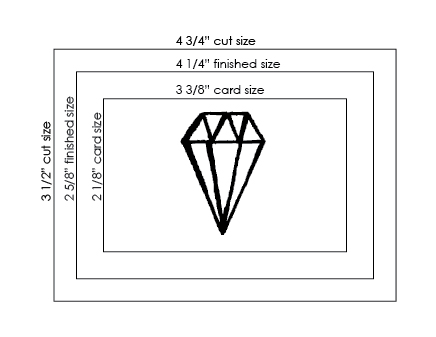
1. Print out the template for your desired purse/wallet design at 100% scale.
2. Trace the illustration and outer corners of the template onto the Right Side of your solid fabric. Connect the outer corners with your ruler to draft the outer rectangle of the template.
3. Mount your solid fabric in your hoop and embroider the motif with coordinating floss by following the design you traced onto the fabric. For our samples, we used the following stitches:
Chain Stitch
This is a great basic stitch for drawing lines in a design. We used it on the fine lines of the gem on our coin purse, and in the handle bars, wheel spokes and frame of the bicycle on our card wallet.
1. Pick up one or two threads with your needle along a line drawn on your fabric, very close to where the other end of your working floss emerges from the cloth.
2. Feed your needle between the threads of your floss where it emerges from the fabric and pull the stitch taught.
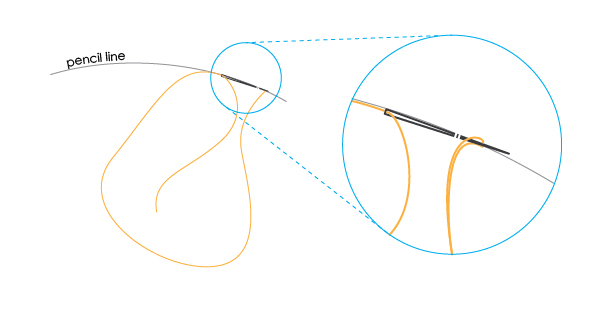
3. Repeat this process, picking up a couple of threads a little further along the line and feeding the needle through the tail where it emerges from the stitch your just made. After a few of these stitches, you’ll have a “chain” that looks like this:
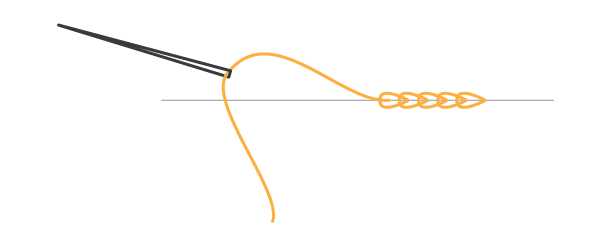
Satin Stitch
Whereas the chain stitch draws lines, the satin stitch is perfect for coloring in small spaces. We used it for the thicker lines on our gem and for the tires, chain guard and seat of our bicycle.
1. Sew a stitch across the width of the space your want to fill. Sew a second one right next to it, running parallel. Repeat this process until the side-by-side lines of floss fill the desired space in your design.
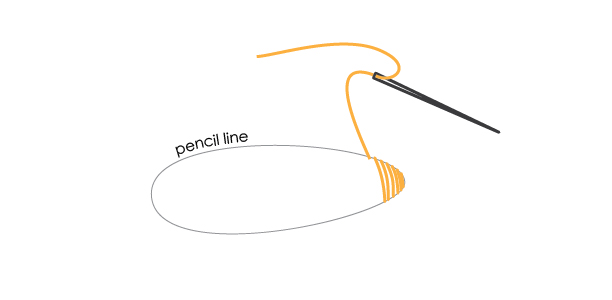
We’ve spaced out the stitches slightly in our diagram so you can see how they’re arranged, but in reality your stitches should sit snugly against one another.
Assembly
1. Cut our your embroidered panel from the solid fabric. Trace it onto the Wrong Side of your quilting cotton and cut that out as well.
2. Lay both panels on your pressing surface, Wrong Sides up, and cover them with your fusing, glue side down. Iron well to bond the fabrics and peel them away from the pressing surface. Cut away your excess fusing.
3. Install your zipper along the top edges of your two panels, making sure that the printed pattern and your embroidered motif are oriented in the same direction. We have a tutorial for installing zippers here. In this case, you’re just going to tack the two panels together with a few stitches at each end instead of sewing real seams at either end of the zipper’s gap.
4. With the zipper most of the way open, sew the remaining three side of the wallet/purse together, Wrong Sides facing, with a 1/4” seam. Backstitch at both ends, and be careful not to catch the seam allowance from installing the zipper while sewing this seam.
5. Tack the ends of the zipper tape to the side seams by hand.
6. Clip your corners and invert the project through the zipper opening.
We hope you enjoyed this tutorial! This coin purse/card wallet is super useful and practical, and would make the perfect gift for any one who needs a bit of organization. Be sure to check out all our other DIY projects for more gift-giving ideas!
If you decide to give this project a try, be sure to send us a picture at info@camelotfabrics.com or you can tweet it to us! We LOVE seeing all your fan projects, and you could be featured in a future Fan Friday post.
Happy Sewing!
June 26, 2015 at 9:14 pm, carol said:
Hi, where do you get your zippers that small other than cutting them up? Thank you!
December 23, 2015 at 12:34 pm, diseño de pagina web en zaragoza said:
Por otro lado, a nivel gráfico y de contenidos, el diseño es atractivo,
moderno y simplificado para los usuarios.